
Enable and configure Stripe in LootLocker so it can be used to handle in-app purchases.
Prerequisites
Section titled “Prerequisites”No prerequisites.
Create a Stripe Connected Account
Section titled “Create a Stripe Connected Account”Before Stripe can be used for purchases in LootLocker, your game must be connected to a Stripe Connected Account. To create one for use with LootLocker, contact LootLocker via email — this is currently a manual onboarding process.
Configure Stripe in LootLocker
Section titled “Configure Stripe in LootLocker”In the LootLocker Web Console, select Settings > In-App Purchases, then select Stripe from the list of available providers and click the Enable toggle to enable Stripe as a purchase provider for your game.
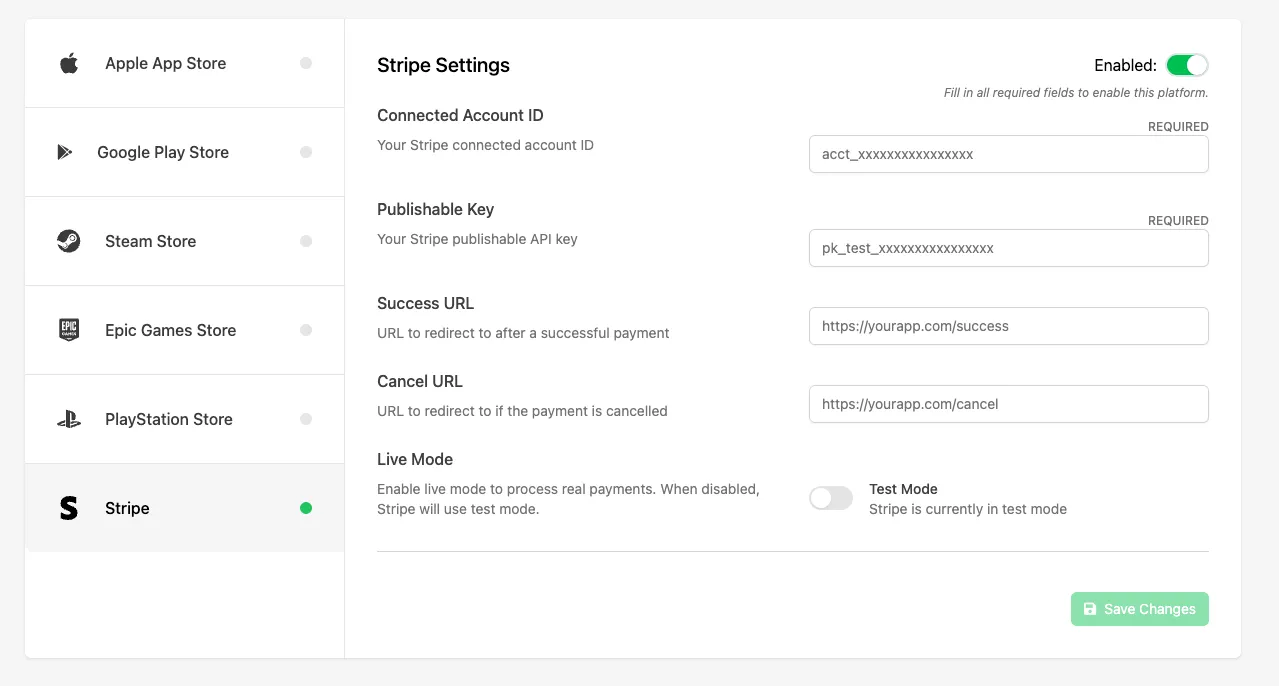
Fill in the following fields:
- Connected Account ID: your Stripe Connect account ID (for example,
acct_...). This identifies the Stripe account that receives payments. - Publishable Key: your Stripe publishable API key (for example,
pk_test_...orpk_live_...). This is used by the client to initialize Stripe payments. - Success URL: the URL players are redirected to after a successful payment — typically a confirmation or return-to-game page.
- Cancel URL: the URL players are redirected to if they cancel the payment flow.
- Live Mode: enables real payments. When disabled, Stripe operates in test mode using test credentials, and no real charges are made.
Test Mode
Section titled “Test Mode”While testing your integration, leave Live Mode toggled off. This lets you use Stripe's test environment and test payment methods to verify purchases are working correctly before going live. In test mode, use the Test Publishable Key (for example, pk_test_...) provided by Stripe.
When you're ready to accept real payments, toggle Live Mode, switch to the Live Publishable Key (for example, pk_live_...), and save your changes.
Conclusion
Section titled “Conclusion”You've enabled Stripe for in-app purchases and configured the required settings in LootLocker. Next, configure Catalog Listings to support Stripe IAP.