
This how-to applies your Branding Elements to the hosted onboarding page players register on, so a playtest sign-up looks like your game.
Prerequisites
Section titled “Prerequisites”- At least one Branding Element to apply.
- A Playtest, to see the branding on a live page.
Open the playtest.game Tab
Section titled “Open the playtest.game Tab”Click Settings in the Web Console sidebar, open Branding, and select the playtest.game tab.
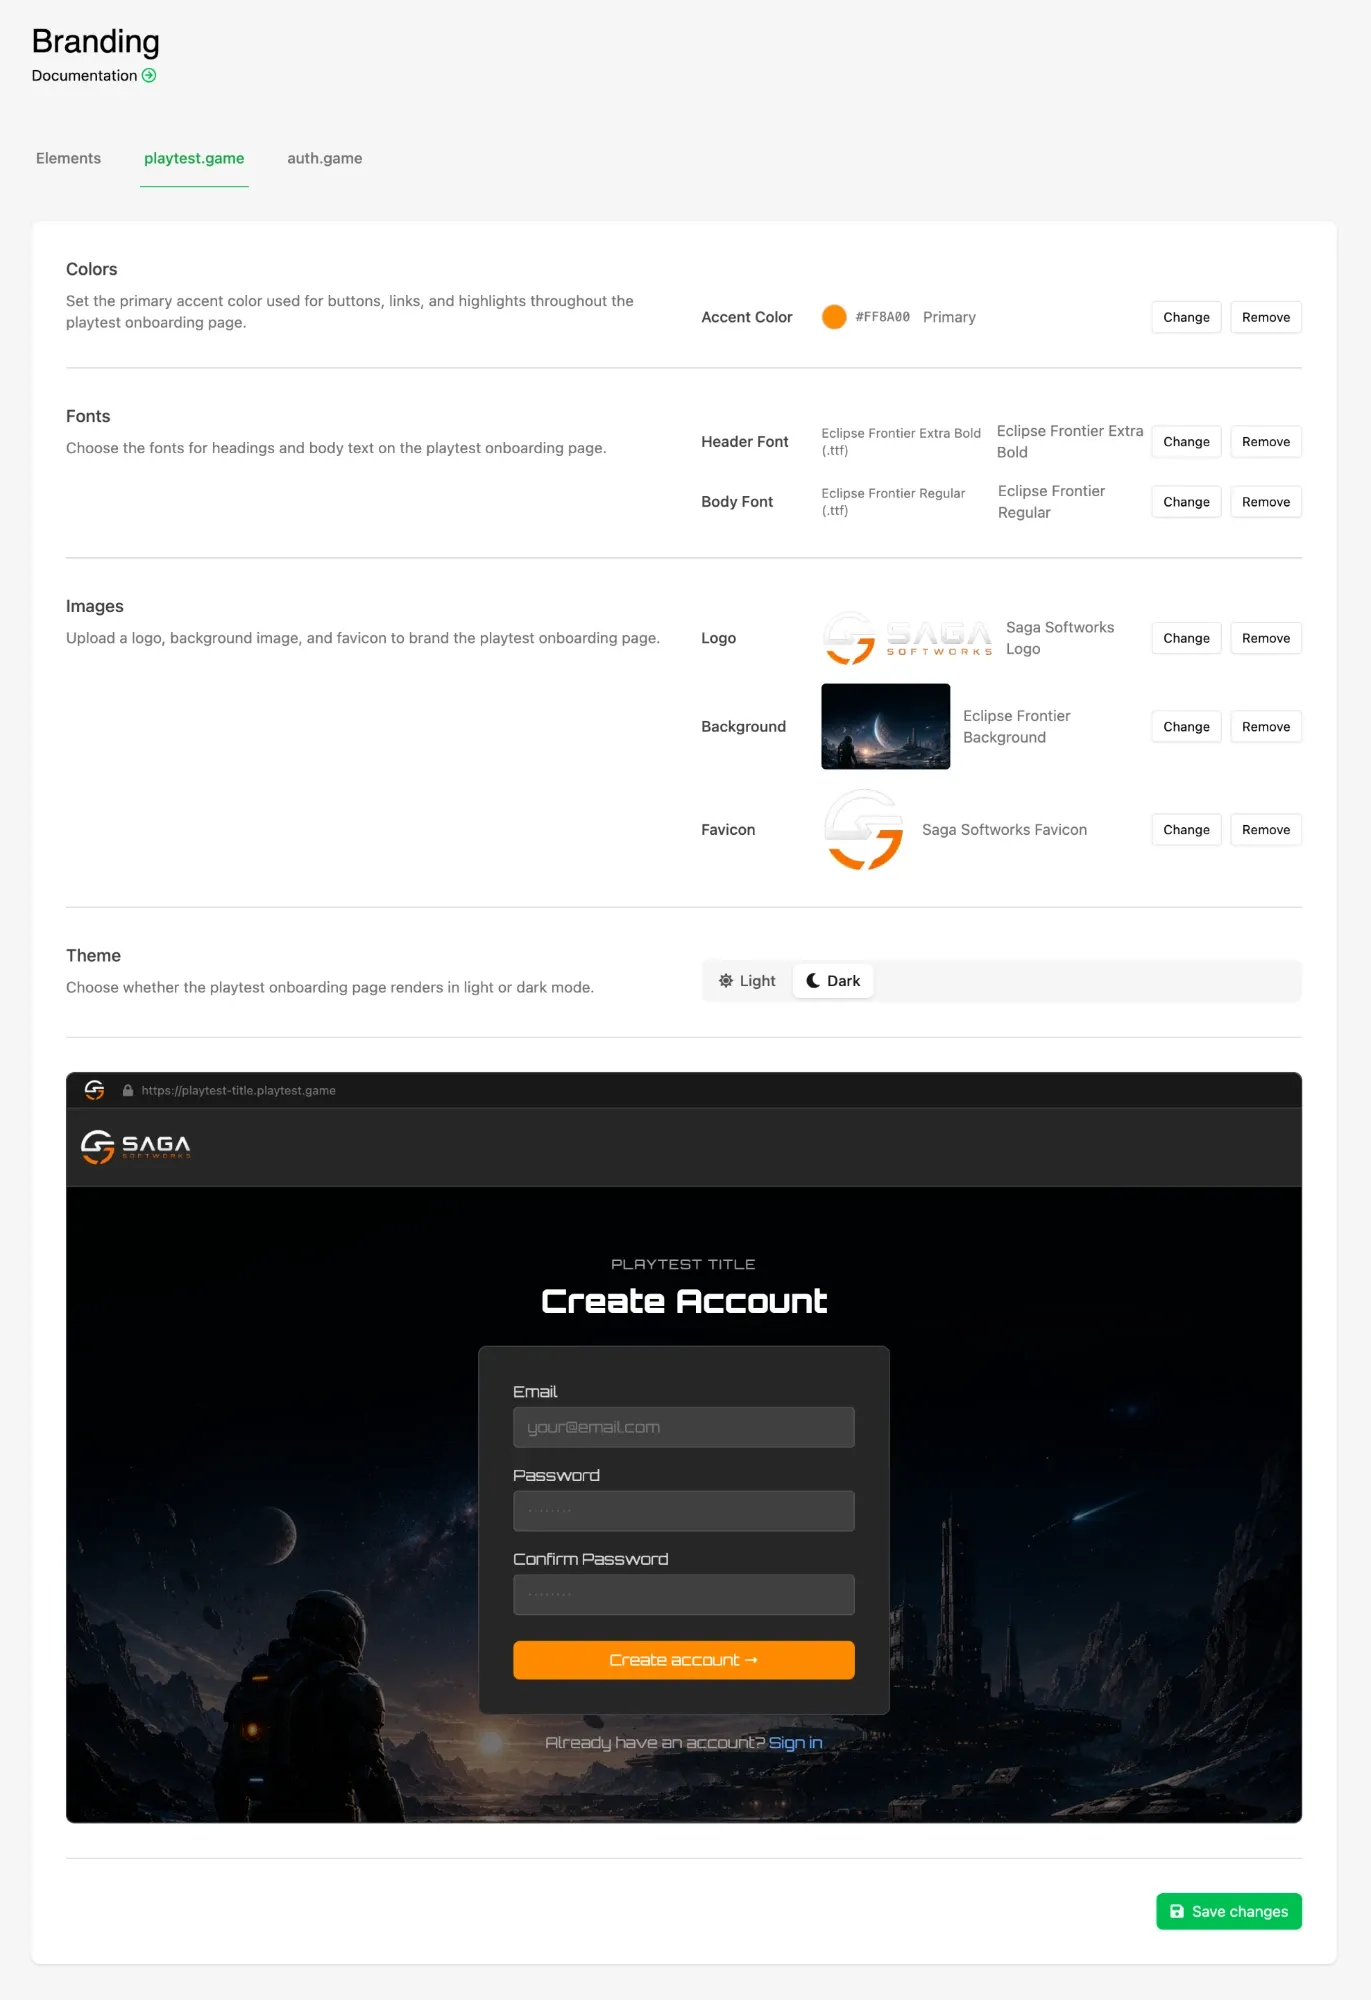
Every slot on this tab starts as Not set and falls back to default styling. Click Select to fill one, and once it holds an Element the buttons become Change and Remove.
Set the Accent Color
Section titled “Set the Accent Color”Accent Color is the color used for buttons, links, and highlights across the onboarding page — the sign-up button, the acknowledgement prompts, the links between steps. Pick a colour Element with enough contrast against your background to stay readable.
Choose the Fonts
Section titled “Choose the Fonts”Pick a Header Font for headings and a Body Font for everything else. Choosing the same Element for both is fine if your game uses one typeface.
Set the Images
Section titled “Set the Images”Three image slots shape the page:
- Logo sits in the header bar at the top of every onboarding step.
- Background fills the page behind the sign-up form.
- Favicon is the icon shown in the browser tab.
Pick a Theme
Section titled “Pick a Theme”Theme switches the page between Light and Dark. This sets the base the rest of your choices sit on, so pick whichever suits your background image — a dark background usually wants the dark theme underneath it.
Check the Preview and Save
Section titled “Check the Preview and Save”The preview at the bottom of the page updates live as you make each choice, showing the account creation step with your branding applied. It is a preview rather than a working page, so use it to judge the look, not to click through the flow.
Click Save changes when you are happy with it.
Conclusion
Section titled “Conclusion”Your playtest onboarding page now carries your game's identity from the first screen a player sees. The same Elements can be applied to your hosted sign-in page in Brand Your Sign-In Page.