
This how-to creates and configures an Asset in the Web Console, including setting up the Asset Context it belongs to.
Prerequisites
Section titled “Prerequisites”No prerequisites.
Configure Asset Contexts
Section titled “Configure Asset Contexts”Before you create your first Asset, configure an Asset Context so LootLocker knows what type of Asset you're creating and how you plan to use it in your game.
An Asset Context is a way to group and describe Assets. All Assets must be assigned an Asset Context when they're created. Defining an Asset's Context tells your game what type of Asset it is, and tells LootLocker what information or logic to store on the Asset and any special relationships it should have, for example with Character Classes and Default Loadouts.
Open Content Management in the sidebar of the Web Console, select Assets, then open the Contexts tab. You'll see a menu like this:

To create a new Context, click Add Context. Since this example creates a Generic Asset, select Generic Assets (Simplified) from the Complexity dropdown menu.
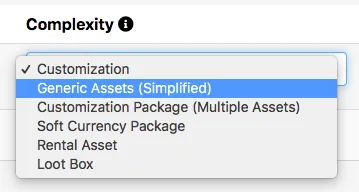
Fill in the rest of the Context's information. A detailed explanation of each Context option is in Understanding Classes & Heroes.
- Name: Hat
- Friendly Name: (leave blank if it's the same as the Name)
- Detachable?: Yes (so a Player can unequip this Context if they don't want to wear a hat)
- User Facing?: Yes
- Depends On: Independent (No Asset)
Click Save Contexts to save this Context. It should now look like this:

Create the Asset
Section titled “Create the Asset”Navigate to the Asset Manager by clicking Content in the sidebar of the Web Console and selecting Assets.

Click Add Asset in the top right corner of the Asset Manager. Enter an Asset Name, select the Hat Context from the dropdown menu, and click Create.
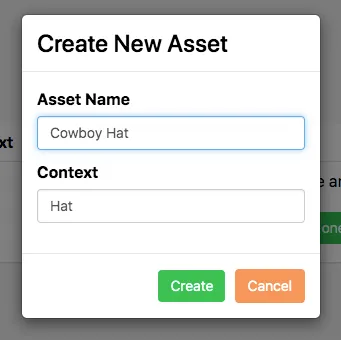
Once the Asset is created, you're taken to the Asset's page, where you can see all of its stored information and data:
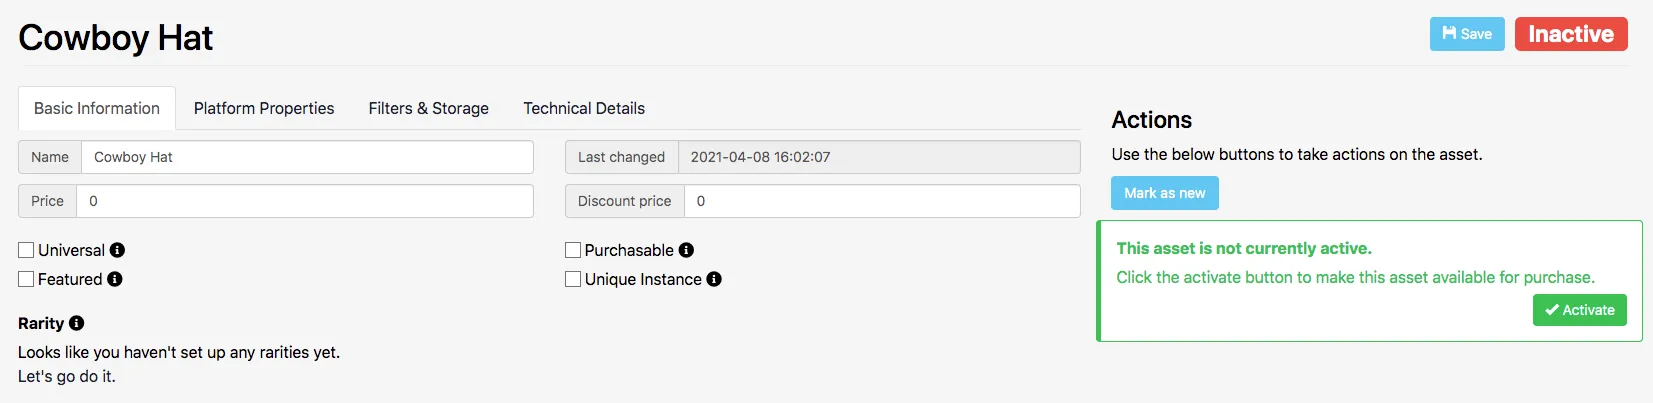
Most fields aren't required, but this example attaches an image your game can use as an in-game icon. Click the Filters & Storage tab in the Asset menu.

Drag the image file you want to use for the Asset's icon into the box under the Files header, or click the box to open a file dialog.

Activate the Asset
Section titled “Activate the Asset”Activate the Asset so it's sent to your game and Players can access it. Click Activate on the right side of the Asset menu — this also saves any changes you've made to the Asset.
Conclusion
Section titled “Conclusion”You've created, configured, and activated an Asset. Now that the Asset is active, it's ready to be retrieved in-game or equipped to a Player's character — see Retrieve Assets In-Game. You can also use an Asset Storage Template to attach additional game-related data to the Asset.