
Now that you have installed the SDK into your Unreal project, you will want to connect the Unreal project to your game in the LootLocker Web Console. The following steps walk you through configuring the LootLocker Unreal Engine SDK to work with a game that has already been created in the LootLocker Web Console. If you haven't created a game or account yet, please visit our account creation page.
Configure the SDK in Project Settings
Section titled “Configure the SDK in Project Settings”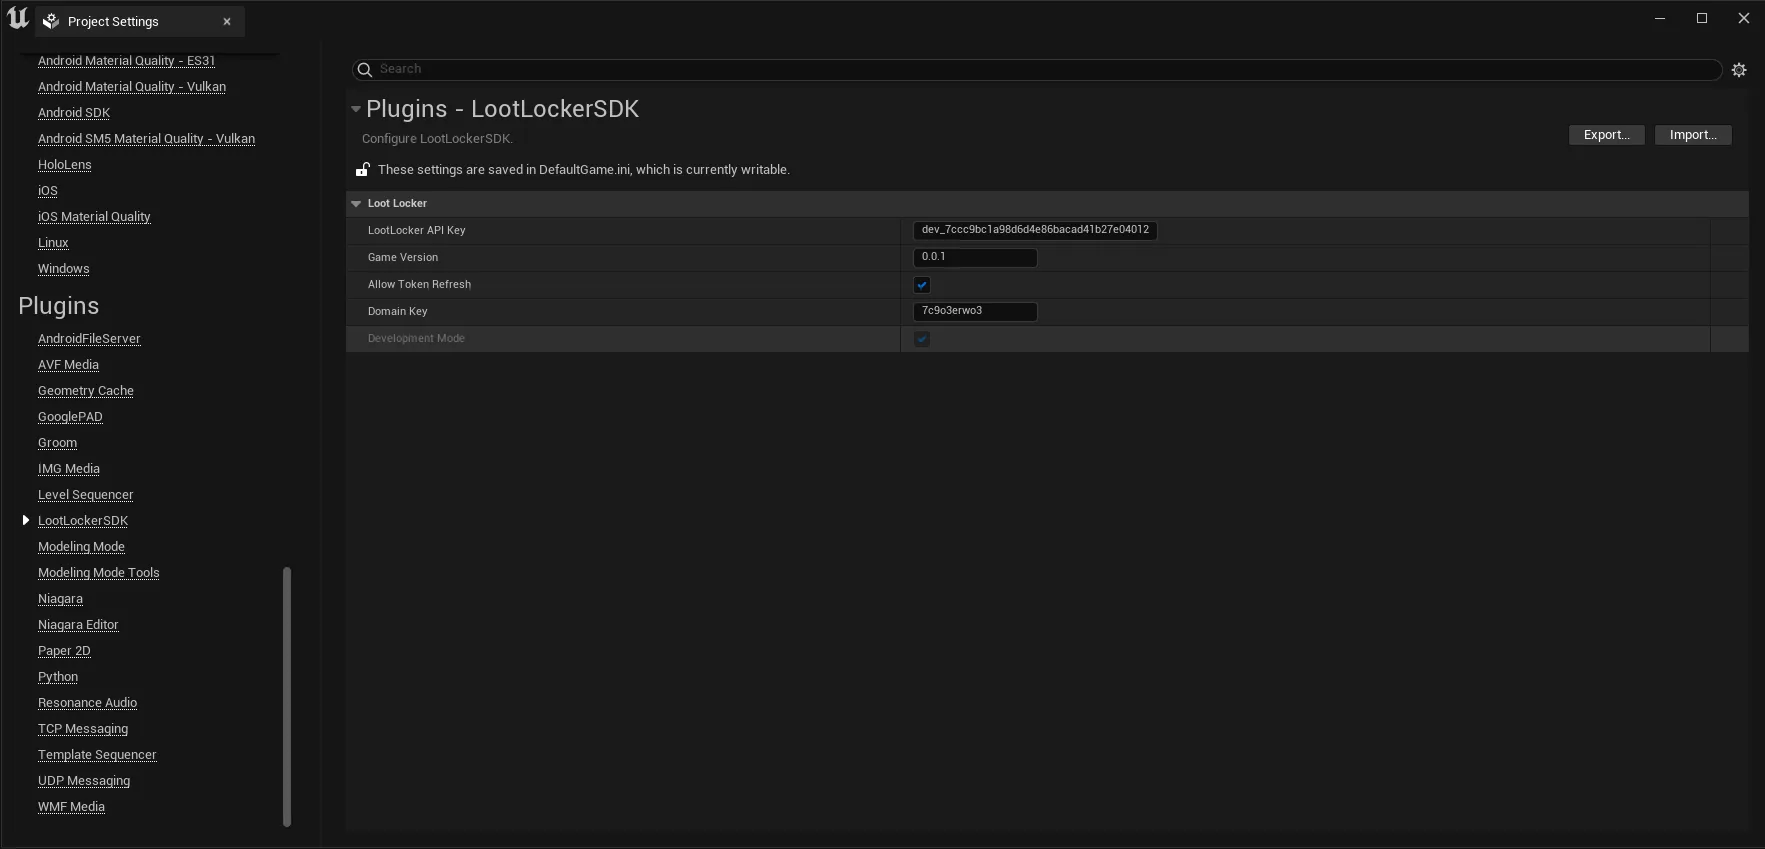
- Login to the LootLocker Web Console by visiting console.lootlocker.com and navigate to the Settings menu and the API Keys section in order to copy the Domain and API Keys.
- In Unreal Engine, navigate to Edit/Project Settings and scroll down the left panel until you reach the Plugins section of the Project Settings. Click on LootLockerSDK.
- Modify the following information:
- API Key is found in Game Settings in the LootLocker Web Console.
- Domain Key is found in Game Settings in the LootLocker Web Console.
- Game Version refers to the current version of your game in the format 1.2.3.4 (the 3 and 4 being optional but recommended).
- Allow Token Refresh can be selected so that the SDK automatically attempts to refresh the session token if it expires. Otherwise the session token needs to be renewed manually.
Deprecated Properties
Section titled “Deprecated Properties”- Platform is the name of the platform the game will be built for (e.g Steam, PSN, Android, iOS). This property has been deprecated and instead of using this, you should call the StartSession method for the platform you want to use.
- On Development Mode lets you test your unpublished changes in the LootLocker Management Console by checking this box. This property has been deprecated, instead use the corresponding api key.
You should now have access to the SDK in both your C++ and Blueprint projects.